Cedar Siding Replacement A Complete Guide
Cedar siding replacement is a significant home improvement project, offering a chance to boost curb appeal and protect your home. This guide walks you through everything from identifying the need for replacement to choosing the right materials and finding a reliable contractor. We’ll cover common problems with cedar siding, explore various replacement options, detail the installation process, and even discuss environmentally friendly disposal methods. Get ready to transform your home’s exterior!
We’ll delve into the specifics of recognizing signs of deterioration, such as rot, warping, and insect damage. We’ll then compare the costs and benefits of different replacement materials like cedar, composite, and vinyl, helping you make an informed decision. Finally, we’ll provide practical advice on finding and working with reputable contractors to ensure a smooth and successful renovation.
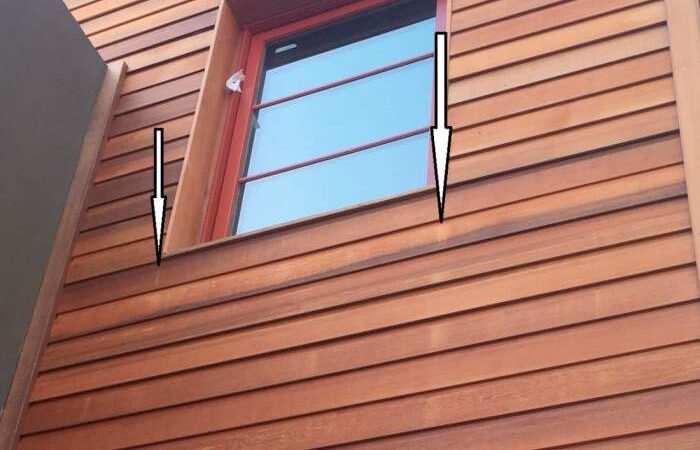
Cedar Siding Deterioration

Source: buffalo-lumber.com
Knowing when your cedar siding needs replacing is crucial for maintaining your home’s curb appeal and structural integrity. Ignoring signs of deterioration can lead to costly repairs down the line, so understanding the common indicators is essential. This section will detail the various ways cedar siding degrades and the visual cues that signal the need for replacement.
Common Signs of Cedar Siding Deterioration
Several visible signs indicate that your cedar siding is nearing the end of its lifespan and requires replacement. These signs range from subtle discoloration to significant structural damage. Early detection can prevent further deterioration and save you money in the long run.
Factors Contributing to Cedar Siding Decay
Cedar siding, while naturally durable, is susceptible to damage from a variety of environmental and biological factors. Understanding these factors is key to preventing premature deterioration and extending the life of your siding.
- Weather: Exposure to sun, rain, snow, and extreme temperature fluctuations causes the wood to expand and contract, leading to cracking, warping, and splitting. Prolonged moisture exposure is a significant contributor to rot.
- Insects: Termites, carpenter ants, and other wood-boring insects can infest cedar siding, weakening its structure and creating channels for water penetration. These infestations can go unnoticed until significant damage is already present.
- Fungal Growth: Various fungi thrive in damp conditions, causing rot and discoloration of the cedar. This often manifests as soft, spongy areas or a change in color, from a healthy reddish-brown to a gray or black hue.
- Lack of Maintenance: Neglecting regular cleaning and protective treatments can accelerate deterioration. Accumulated dirt, debris, and mildew can trap moisture, creating ideal conditions for rot and insect infestation.
Types of Damage Found in Cedar Siding
Cedar siding can suffer from a variety of damage types, each requiring a different approach to repair or replacement. Understanding these different types of damage helps in assessing the extent of the problem and planning the necessary actions.
- Rot: This is characterized by soft, spongy wood that crumbles easily. Rot often begins in areas with prolonged moisture exposure, such as near the ground or around leaky windows and gutters.
- Warping: This involves the distortion of the siding’s shape, causing it to buckle or curve. Warping is often caused by uneven moisture absorption or extreme temperature changes.
- Splitting: This involves cracks running through the wood, often caused by expansion and contraction due to weather changes or insect activity. Splits can weaken the siding and allow water penetration.
Examples of Severely Damaged Cedar Siding
Imagine a section of siding near the ground where the wood is dark, almost black, and mushy to the touch. This is a clear indication of advanced rot, likely caused by prolonged exposure to moisture. Or consider a board that is significantly bowed outward, its surface cracked and splintered – this shows severe warping. Another example would be a board with large, gaping cracks running its length, evidence of significant splitting, potentially caused by years of sun exposure and freeze-thaw cycles. In all these cases, simple repair is unlikely to suffice; complete replacement is the best solution.
Replacement Materials & Cost
Replacing your cedar siding is a significant investment, so understanding the various materials and associated costs is crucial. This section will break down the different options available, their respective lifespans, and the factors that contribute to the overall project expense. We’ll also explore some potential hidden costs that often catch homeowners off guard.
Cedar Siding Replacement Options
Choosing the right replacement material depends on your budget, desired aesthetic, and maintenance preferences. Three common options include new cedar, composite, and vinyl siding. New cedar offers a classic look and natural feel, but requires more maintenance. Composite siding provides a low-maintenance alternative with a wood-like appearance, while vinyl is the most budget-friendly and durable option, although it may not offer the same aesthetic appeal as cedar or composite.
Cost Factors in Cedar Siding Replacement
Several factors influence the total cost of a cedar siding replacement project. These include the material costs themselves, the labor costs of skilled professionals, and any necessary permits. The size of your home, the complexity of the project (e.g., removal of old siding, repairs to underlying sheathing), and your geographic location will also affect the overall price. Additionally, the chosen material significantly impacts the overall cost.
Comparison of Replacement Materials
The following table compares the lifespan, maintenance requirements, and initial cost of different siding materials. These figures are estimates and can vary based on factors like material quality, labor rates, and project complexity. Always obtain multiple quotes from reputable contractors.
| Material | Lifespan (Years) | Maintenance | Initial Cost (per sq ft, estimate) |
|---|---|---|---|
| Cedar | 30-50 | High (staining, cleaning) | $8-$15 |
| Composite | 25-40 | Medium (occasional cleaning) | $6-$12 |
| Vinyl | 20-30 | Low (occasional cleaning) | $4-$8 |
Hidden Costs of Cedar Siding Replacement
While the initial cost estimates are important, several hidden costs can significantly impact your budget. These unexpected expenses can include:
- Unexpected repairs to underlying sheathing or structure: During siding removal, you may discover rotted wood or other structural damage requiring additional repairs before new siding can be installed. For example, discovering extensive water damage behind the old siding could add thousands to the project cost.
- Disposal fees for old siding: Proper disposal of old siding materials is crucial and can incur additional costs, especially for larger projects.
- Permitting and inspection fees: Building permits are often required for exterior renovations and can vary in cost depending on your location and the project’s scope. Inspection fees are also common.
- Landscaping adjustments: Removing and reinstalling landscaping around the house may be necessary, adding to the overall project cost.
- Unexpected material costs: If you encounter unforeseen challenges during the project, you may need to purchase additional materials, increasing the total cost.
Installation Process
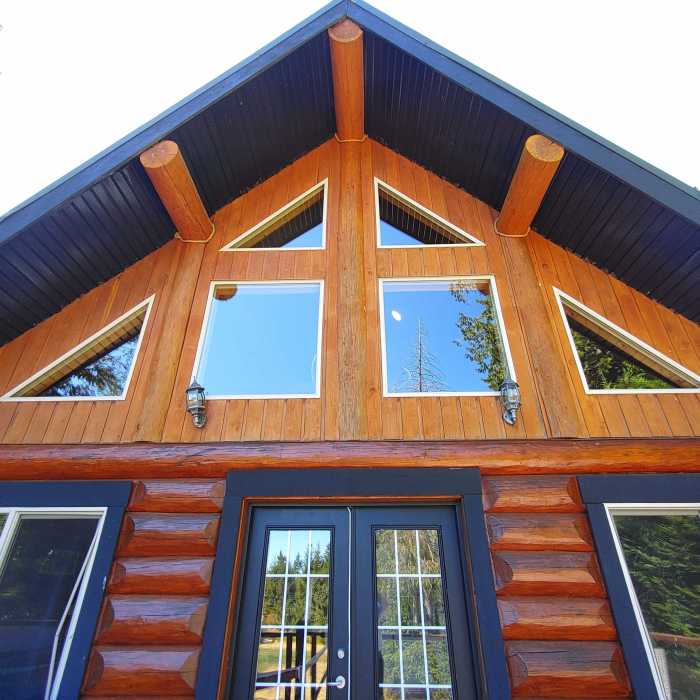
Source: longhousecedar.com
Replacing cedar siding is a significant undertaking, requiring careful planning and execution. This section details the steps involved, from removing the old siding to installing the new, ensuring a long-lasting and aesthetically pleasing result. Remember to always prioritize safety and follow local building codes.
Old Siding Removal
Removing the old cedar siding is the first crucial step. Begin by carefully inspecting the siding to identify any areas of significant damage or deterioration that might require extra attention during removal. Start at the top of the wall and work your way down, removing one section at a time. Use a pry bar to gently loosen the siding from the underlying sheathing, being mindful not to damage the sheathing itself. Dispose of the old siding responsibly, considering recycling options if available. For stubborn sections, a reciprocating saw might be necessary, but always use caution to avoid damaging the house’s structure.
House Preparation for New Siding, Cedar siding replacement
Before installing the new siding, thorough preparation is vital. This involves a careful inspection of the underlying sheathing for any damage, rot, or insect infestation. Any damaged sheathing must be replaced with new material, ensuring a solid and level surface for the new siding. This is crucial for preventing future problems and ensuring the longevity of the new siding. Repair any gaps or cracks in the sheathing using appropriate materials and techniques. Also, ensure all flashing around windows and doors is in good condition and properly sealed. This step is essential to prevent water damage and ensure the new siding remains protected from the elements.
New Siding Installation: Lap Siding
Lap siding, a classic choice, is installed horizontally, with each piece overlapping the one below. Begin at the bottom of the wall and work your way up. Ensure each piece is properly aligned and secured with nails or screws, driven at the appropriate angle to prevent splitting. Maintain consistent spacing between boards for a professional look. Use a level to ensure each course is perfectly horizontal. Properly caulking the seams between the boards is crucial to prevent water penetration. Remember to leave expansion gaps at the top and bottom of the siding to account for temperature fluctuations. For example, a common gap might be 1/4 inch at the bottom and 1/2 inch at the top of a wall section.
New Siding Installation: Shingle Siding
Shingle siding installation differs slightly from lap siding. Shingles are typically applied vertically or diagonally, overlapping each other in a staggered pattern. Start at the bottom of the wall and work your way up, securing each shingle with nails or screws, again paying attention to the angle to avoid splitting. Ensure each shingle is properly aligned and overlaps the previous shingle according to manufacturer’s specifications. This overlapping provides a weather-resistant barrier. The use of starter strips at the bottom is crucial to provide a straight, even starting point. Properly flashing around windows and doors remains crucial.
Step-by-Step Guide: Installing New Cedar Siding (Lap Siding Example)
- Measure and cut the cedar siding boards to the appropriate length, allowing for overlap and expansion gaps.
- Install a starter strip along the bottom of the wall to provide a level base.
- Apply the first course of siding, ensuring it’s level and flush with the starter strip. Secure it with nails or screws.
- Continue installing subsequent courses, ensuring proper overlap (typically 1 inch) and consistent spacing.
- Use a level to check the alignment of each course and make adjustments as needed.
- Caulk all seams between the boards to prevent water penetration.
- Install corner boards, window and door trim, and any other necessary finishing pieces.
- Finally, inspect the entire installation for any gaps or inconsistencies and make any necessary repairs.
Remember, these are general guidelines. Always consult the manufacturer’s instructions for specific details and recommendations. Accurate measurements and careful attention to detail are key to a successful installation. Consider using a chalk line to help maintain straight lines. For larger projects, seeking professional help might be advisable.
Maintenance & Longevity: Cedar Siding Replacement
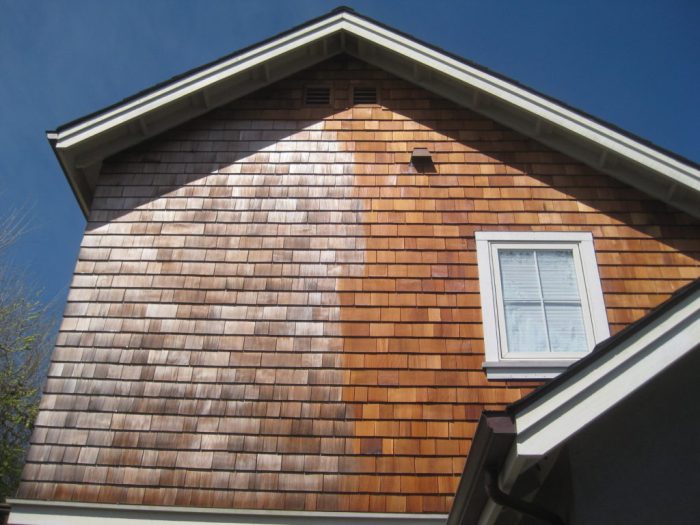
Source: sidingauthority.com
Proper maintenance is key to maximizing the lifespan and beauty of your new cedar siding. Neglecting regular care can lead to premature deterioration, necessitating costly repairs or even complete replacement down the line. Understanding the impact of weather and addressing common issues proactively will ensure your investment remains attractive and structurally sound for years to come.
Cedar Siding Maintenance Practices
Regular cleaning and occasional treatments are essential for preserving the natural beauty and longevity of cedar siding. Annual cleaning removes dirt, mildew, and other debris that can damage the wood. A gentle power washing, using a low-pressure nozzle to avoid damaging the wood grain, is effective. For stubborn mildew, a solution of bleach and water (always follow manufacturer instructions carefully) can be applied, but thorough rinsing is crucial afterward. Consider applying a high-quality, water-repellent wood sealant every few years to protect against moisture damage and UV degradation. This sealant helps prevent the wood from absorbing too much water, reducing the risk of rot and warping. Regular inspection for any signs of damage or insect infestation is also critical.
Weather Conditions and Siding Longevity
Different weather conditions significantly impact the longevity of various siding materials. Cedar, being a natural wood, is susceptible to moisture damage in consistently humid climates. Prolonged exposure to rain and snow can lead to rot and warping if not properly sealed. Conversely, extremely dry climates can cause cedar to shrink and crack. Vinyl siding, on the other hand, is more resistant to moisture but can be susceptible to damage from hail or strong winds. Fiber cement siding offers a good balance, resisting moisture and impact damage well, but it can be more prone to cracking in extreme temperature fluctuations. In coastal areas, all siding types are vulnerable to salt spray, which accelerates deterioration. Regular maintenance, such as cleaning and sealing, is crucial regardless of climate, but the frequency and type of maintenance may need to be adjusted based on local weather conditions. For example, in a humid climate, more frequent cleaning and sealing may be necessary.
Common Maintenance Issues and Solutions
Several common maintenance issues can affect cedar siding. One frequent problem is mildew growth, which appears as dark discoloration on the surface. This can be addressed with a mild bleach solution and thorough rinsing. Another common issue is cracking or warping due to moisture exposure. Regular sealing can help prevent this, but severely damaged boards may require replacement. Insect infestations, such as carpenter ants or termites, can cause significant structural damage. Regular inspections and prompt professional treatment are crucial to prevent widespread infestation. Finally, peeling paint or sealant indicates a need for reapplication to maintain protection against the elements. Addressing these issues promptly prevents minor problems from escalating into major repairs.
Preventative Maintenance Checklist
A yearly preventative maintenance checklist can significantly extend the life of your cedar siding.
- Spring Cleaning: Inspect siding for damage, remove debris and loose materials.
- Mildew Treatment: Treat any mildew growth with a bleach solution (if necessary).
- Power Washing: Gently power wash the siding to remove dirt and grime.
- Inspection: Check for signs of insect infestation, rot, or warping.
- Caulk: Repair any gaps or cracks with exterior-grade caulk.
- Sealant Application: Reapply wood sealant every few years (frequency depends on climate).
- Autumn Inspection: Perform a final inspection before winter to identify any potential issues.
Finding & Hiring Contractors
Replacing your cedar siding is a significant investment, so choosing the right contractor is crucial. A poorly executed job can lead to costly repairs down the line, not to mention the inconvenience and frustration. Taking the time to find a reputable and qualified contractor will save you headaches and ensure a beautiful, long-lasting result.
Finding a qualified and reputable contractor involves careful research and due diligence. Don’t rush the process; the right contractor will be worth the effort. Consider using multiple avenues to find potential candidates, including online searches, referrals from friends and family, and checking with your local building association. Look for contractors with a proven track record, positive online reviews, and a clear understanding of cedar siding installation.
Contractor Selection Criteria
Before contacting any contractors, create a list of criteria to guide your selection. This will help you efficiently narrow down your options and ensure you’re focusing on the most important aspects. Consider factors like experience with cedar siding, licensing and insurance, and the availability of references. A thorough understanding of their processes and their commitment to quality craftsmanship will help you make an informed decision.
Questions to Ask Potential Contractors
It’s vital to ask detailed questions to assess a contractor’s qualifications and suitability for your project. These questions should cover their experience, licensing, insurance, project timelines, payment terms, and warranty information. Don’t hesitate to ask for clarification on anything you don’t understand. Thorough communication is key to a successful project.
- Years of experience in cedar siding installation and repair.
- Number of similar projects completed successfully.
- Details of their licensing and insurance coverage (including worker’s compensation).
- Detailed project timeline, including start and completion dates.
- Payment schedule and accepted payment methods.
- Warranty offered on materials and workmanship.
- Their process for handling unforeseen issues or changes during the project.
- References from previous clients.
Obtaining and Comparing Multiple Quotes
Getting at least three quotes from different contractors is essential for comparison and negotiation. This allows you to compare pricing, materials, and project timelines. Don’t solely focus on the lowest price; consider the overall value proposition, including the contractor’s experience, reputation, and the quality of their proposed work. A slightly higher price might be justified by superior quality and a more comprehensive warranty.
For example, Contractor A might offer a lower price but have limited experience with cedar siding, while Contractor B offers a higher price but has a stellar reputation and a longer warranty. Carefully weigh these factors before making your decision.
Reviewing Contractor Licenses and Insurance
Verifying a contractor’s license and insurance is crucial for protecting yourself from potential liabilities. Contact your state’s licensing board to verify their license status and ensure it’s current and in good standing. Confirm that they carry general liability insurance and worker’s compensation insurance. This protects you from financial responsibility if accidents occur on your property or if the contractor’s work causes damage. Request copies of their insurance certificates to confirm coverage. Failure to do so could leave you vulnerable to significant financial losses.
Environmental Considerations
Replacing your cedar siding presents an opportunity to consider the environmental impact of your choices. From disposal of the old siding to the selection of new materials, several decisions affect the planet’s health. Let’s examine these factors to make informed, eco-conscious choices.
Cedar Siding Disposal and Recycling
Cedar, while a natural material, doesn’t simply disappear when discarded. Improper disposal contributes to landfill overcrowding and methane emissions. Fortunately, environmentally friendly options exist. Many municipalities offer wood recycling programs, where the cedar can be chipped and used for mulch or biomass energy. Alternatively, some contractors specialize in reclaiming and repurposing old cedar siding, extending its lifespan and reducing waste. Checking with local recycling centers and contractors is crucial to identify the best option for your area.
Environmental Comparison of Siding Materials
Choosing replacement siding involves weighing the environmental impact of different materials. Cedar, while renewable, requires significant energy for harvesting, processing, and transportation. Its longevity offsets some of this impact, but the initial carbon footprint is considerable. Composite siding, often made from recycled plastic and wood fibers, boasts a lower carbon footprint than cedar in manufacturing. However, its lifespan and recyclability are often less than cedar. Vinyl siding, a petroleum-based product, has a high initial carbon footprint and limited recyclability, making it the least environmentally friendly option among the three. The overall environmental impact also depends on factors such as transportation distances and the energy efficiency of the home after siding replacement. For example, a home with improved insulation after siding replacement might offset some of the material’s initial carbon footprint through reduced energy consumption.
Minimizing Waste During Replacement
Careful planning and execution can significantly reduce waste during siding replacement. Accurate measurements before purchasing new siding minimizes excess materials. Salvaging usable pieces of the old siding for smaller projects or repurposing them in other ways further reduces waste. Working with a contractor who emphasizes waste reduction and proper disposal practices is also essential. For example, a contractor might use efficient cutting techniques to minimize scrap, and ensure proper sorting and recycling of materials at the job site. Careful sorting of materials (wood, nails, etc.) before disposal will increase the efficiency of recycling programs.
Summary

Source: elitehomeexteriorsnw.com
Replacing your cedar siding is a worthwhile investment that enhances your home’s beauty and longevity. By understanding the process, from identifying damage and choosing materials to finding a qualified contractor and performing proper maintenance, you can ensure a successful project. Remember, a well-maintained exterior protects your home and increases its value. So, take the plunge and transform your home’s exterior with stunning new siding!
Key Questions Answered
How long does cedar siding replacement typically take?
The timeframe varies greatly depending on the size of your home, the complexity of the project, and weather conditions. Expect it to take anywhere from a few days to several weeks.
Can I replace cedar siding myself?
While possible for smaller projects with basic skills, replacing siding is a demanding task. For larger homes or complex issues, hiring a professional is recommended to ensure proper installation and avoid costly mistakes.
What’s the warranty on new cedar siding?
Warranties vary by manufacturer and type of siding. Check the specific product warranty for details on coverage and duration. It’s typically between 15-25 years.
How do I dispose of old cedar siding responsibly?
Check with your local waste management facility for options. Some areas offer recycling programs for wood waste, while others may require disposal at a landfill. Proper disposal minimizes environmental impact.
What’s the best time of year to replace cedar siding?
Spring and fall are generally ideal as they offer moderate temperatures and less chance of rain interfering with the installation process. Avoid extreme heat or cold.
Comments are closed.