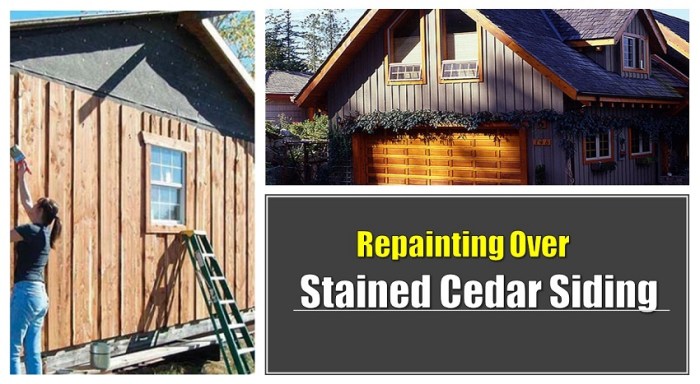
Cedar Siding Repair and Painting Near Me
Cedar siding repair and painting near me—it sounds like a chore, right? But keeping your cedar siding looking great isn’t just about curb appeal; it’s about protecting your home’s structure. This guide will walk you through everything from identifying common problems like rot and insect damage to choosing the right paint and finding a reliable contractor. We’ll cover repair techniques, painting preparation, and even help you navigate the costs involved. Get ready to spruce up your home’s exterior!
We’ll delve into the specifics of repairing damaged boards, fixing cracks, and addressing rot. Learn how to prep your siding for painting—cleaning, caulking, and priming are all crucial steps. We’ll also explore different painting techniques and paint types to ensure a long-lasting, beautiful finish. Finally, we’ll offer advice on finding reputable contractors and understanding the costs associated with professional versus DIY approaches.
Understanding Cedar Siding Issues
Source: repaintnow.com
Cedar siding, while beautiful and durable, is susceptible to various problems that necessitate repair and repainting. Understanding these issues is crucial for maintaining your home’s exterior and extending the life of your siding. Ignoring these problems can lead to costly repairs down the line.
Cedar Siding Problems Requiring Repair and Painting
Cedar siding is a natural material, and as such, it’s prone to several issues influenced by environmental factors and the aging process. These problems often necessitate repair and repainting to restore the siding’s aesthetic appeal and structural integrity.
Causes of Rot, Warping, and Insect Damage
Rot in cedar siding is primarily caused by prolonged exposure to moisture. This can stem from inadequate drainage around the foundation, leaking gutters, or damaged flashing around windows and doors. Water penetrates the wood, creating an ideal environment for fungal growth, leading to decay and structural weakening. Warping occurs due to uneven moisture absorption, causing the wood to expand and contract inconsistently. This is often exacerbated by fluctuating temperatures and direct sunlight. Insect infestations, particularly from carpenter ants and termites, weaken the wood from the inside, creating structural vulnerabilities and leaving it susceptible to further damage.
Impact of Weather Exposure on Cedar Siding Lifespan
Weather exposure significantly impacts the lifespan of cedar siding. Prolonged exposure to sunlight causes the wood to fade and dry out, making it brittle and more prone to cracking. Freezing and thawing cycles, especially in climates with significant temperature fluctuations, can lead to expansion and contraction stresses, causing cracks and splitting. High winds and heavy rain can further damage the siding, potentially dislodging boards or causing water damage. Regular maintenance, including cleaning and repainting, can help mitigate these effects and prolong the life of your cedar siding. For instance, a well-maintained cedar siding installation in a moderate climate might last 20-30 years, while one exposed to harsh coastal conditions might only last 15-20 years.
Examples of Cedar Siding Damage
Understanding the different types of damage is key to effective repair. Visual inspection is crucial for identifying problems early.
- Rotted Siding Board: Alt text: A close-up image of a cedar siding board showing significant decay and discoloration, with visible fungal growth. This indicates prolonged water exposure and requires immediate replacement.
- Warped Siding Board: Alt text: A photo of a cedar siding board that is visibly bowed or twisted, indicating uneven moisture absorption and expansion. This may require replacement or careful straightening depending on the severity.
- Insect Damage: Alt text: A picture showing small holes and tunnels in a cedar siding board, suggesting insect infestation. This requires treatment and potentially replacement of affected boards.
- Cracked Siding Board: Alt text: An image displaying a cedar siding board with noticeable cracks running through it, potentially caused by drying, temperature fluctuations, or impact damage. Depending on the severity, repair or replacement might be necessary.
Repair Techniques for Cedar Siding
Repairing cedar siding can significantly extend the life of your home’s exterior and maintain its curb appeal. The techniques you’ll need depend on the extent of the damage. From minor cracks to extensive rot, addressing these issues promptly prevents further deterioration and costly repairs down the line.
Replacing Damaged Cedar Siding Boards
Replacing a damaged cedar siding board is a straightforward process, but requires careful attention to detail to ensure a seamless finish. Begin by removing the damaged board, taking care not to damage surrounding boards. Use a pry bar to gently loosen the board from its fasteners. Once removed, measure the damaged board to determine the correct size for the replacement. Cut the new board to size, ensuring it matches the profile of the existing siding. Finally, install the new board using appropriate fasteners, ensuring it’s flush with the surrounding boards. Remember to caulk around the edges for weatherproofing.
Repairing Minor Cracks and Holes in Cedar Siding
Minor cracks and holes can often be repaired using wood filler. Choose a filler compatible with cedar, such as an epoxy-based filler or a two-part wood repair compound. Clean the area thoroughly, removing any loose wood or debris. Apply the filler according to the manufacturer’s instructions, ensuring it’s level with the surrounding surface. Once dry, sand the filled area smooth and apply a coat of exterior-grade paint to match the existing siding. For very small holes, wood putty might suffice.
Addressing Rotted Areas in Cedar Siding
Rotted areas require more extensive repair. Begin by removing all the affected wood, cutting back to sound material. This may involve removing a section of the siding board or even multiple boards depending on the severity of the rot. After removing the rotted wood, you can use a wood hardener to consolidate the remaining wood and prevent further decay. Once the hardener is dry, you can rebuild the affected area using a wood epoxy filler or by installing a replacement board. After the repair, ensure you apply a quality wood sealant to protect the repaired area from moisture.
Wood Fillers and Sealants Comparison
This table compares different wood fillers and sealants suitable for cedar siding repair. Cost ranges are estimates and may vary based on brand and retailer.
| Product Name | Key Features | Application | Cost Range |
|---|---|---|---|
| Epoxy Wood Filler | Strong, durable, water-resistant | Filling cracks, holes, and rotted areas | $15-$30 per tube |
| Two-Part Wood Repair Compound | Excellent for larger repairs, paintable | Filling significant gaps and rotted sections | $20-$40 per container |
| Wood Putty | Easy to apply, good for small imperfections | Filling small cracks and nail holes | $5-$15 per container |
| Exterior Wood Sealer | Protects wood from moisture and UV damage | Sealing repaired areas and all cedar siding | $10-$30 per quart |
Cedar Siding Painting Preparation: Cedar Siding Repair And Painting Near Me
Getting your cedar siding ready for a fresh coat of paint is crucial for a long-lasting, beautiful finish. Proper preparation ensures the paint adheres well, preventing peeling and premature deterioration. This involves more than just grabbing a brush; it’s a multi-step process that will significantly impact the final result. Think of it as laying a solid foundation for a stunning new look for your home.
Cleaning and Surface Preparation
Thorough cleaning is the first and arguably most important step. Dirt, mildew, loose paint, and other debris will prevent the new paint from bonding properly. Start by gently washing the siding with a pressure washer, using a low-pressure setting to avoid damaging the wood. For stubborn mildew, a solution of bleach and water (follow product instructions carefully!) can be applied, but always rinse thoroughly afterwards. After washing, allow the siding to dry completely before proceeding. Scraping away any loose or peeling paint is also essential to create a smooth surface for the new paint to adhere to. This ensures a uniform and even finish. Pay close attention to areas where paint has chipped or blistered.
Caulking and Sealing Gaps
Before painting, inspect your cedar siding for any gaps, cracks, or holes. These imperfections can allow moisture to penetrate, leading to rot and further damage. Use a high-quality exterior-grade caulk to fill these gaps, ensuring a weathertight seal. Choose a caulk that is compatible with both wood and paint. Allow the caulk to dry completely before painting to prevent it from being pulled away by the paint. This step is critical for protecting your home from the elements and extending the life of your paint job. Consider using different colored caulks to match your siding color for a seamless finish.
Cedar Siding Painting Preparation Checklist
This checklist ensures you don’t miss any vital steps:
- Inspect siding for damage (cracks, holes, loose boards).
- Repair any damaged areas (replace rotted wood, etc.).
- Clean siding thoroughly with a pressure washer (low pressure).
- Apply mildew remover if necessary, rinse thoroughly.
- Allow siding to dry completely.
- Scrape away loose or peeling paint.
- Caulk and seal all gaps and cracks.
- Allow caulk to dry completely.
- Prime bare wood or previously unpainted areas (if necessary).
- Allow primer to dry completely.
Painting Cedar Siding
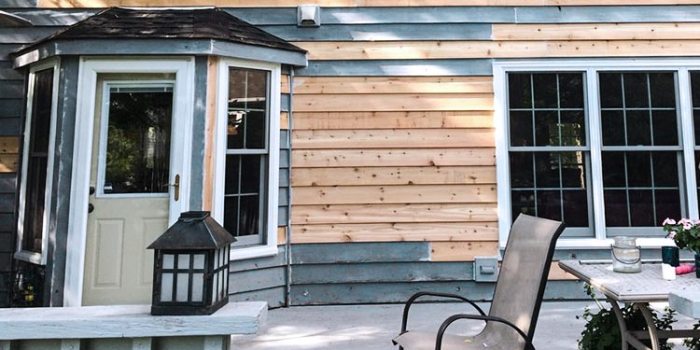
Source: visexterior.com
Painting cedar siding protects it from the elements and enhances its natural beauty. Proper preparation and technique are crucial for a long-lasting, attractive finish. This section details the process of priming and painting your cedar siding, including paint type selection and application methods.
Primer Application to Cedar Siding
Applying a quality primer is a critical first step. Primer seals the wood, preventing excessive paint absorption and promoting better adhesion. For cedar, a stain-blocking primer is recommended to prevent knots and tannins from bleeding through the topcoat. Before applying primer, ensure the siding is clean, dry, and free from any loose debris or mildew. Use a brush, roller, or sprayer to apply a thin, even coat, following the wood grain. Allow the primer to dry completely according to the manufacturer’s instructions before painting. Overlapping coats slightly ensures complete coverage.
Painting Techniques for Cedar Siding
Several techniques can be used to apply paint to cedar siding, each with its own advantages and disadvantages.
Brush painting offers excellent control and allows for precise application, especially in hard-to-reach areas. However, it can be more time-consuming than other methods.
Roller painting is faster and covers larger areas efficiently. However, it may not provide as much control in intricate areas or around trim. Using a high-quality roller cover designed for exterior use is important.
Spray painting is the fastest method and provides a smooth, even finish. However, it requires more specialized equipment and can be messy if not done properly. Overspray can also be an issue, requiring careful preparation of surrounding areas.
Paint Type Selection for Cedar Siding
Choosing the right paint is essential for a durable and attractive finish. Both oil-based and water-based paints are suitable for cedar siding, but each has distinct characteristics.
Oil-based paints offer superior durability and water resistance, providing excellent protection against the elements. However, they have a strong odor, require longer drying times, and are more challenging to clean up.
Water-based paints are low-odor, dry quickly, and are easier to clean up. They are also generally more environmentally friendly. While they may not offer the same level of durability as oil-based paints, high-quality water-based paints specifically formulated for exterior use provide excellent protection for cedar siding.
Applying Paint to Vertical Siding Boards
*(Imagine a simple illustration showing three vertical cedar siding boards. The first board shows paint being applied in a smooth, vertical stroke from top to bottom, slightly overlapping each stroke. The second board shows paint applied haphazardly, resulting in uneven coverage and visible brushstrokes. The third board shows paint applied too thickly, resulting in runs and drips.)*
The illustration depicts the correct and incorrect methods of applying paint. The proper technique involves applying paint in long, smooth, vertical strokes following the grain of the wood. Each stroke should slightly overlap the previous one to ensure complete coverage and prevent streaks. Avoid applying paint too thickly, which can lead to runs and drips. Painting in thin, even coats allows for better penetration and drying, resulting in a more durable and aesthetically pleasing finish. Uneven application leads to an unattractive appearance and may compromise the protective qualities of the paint. Overly thick coats lead to runs, drips, and a longer drying time, potentially increasing the risk of imperfections.
Finding Local Professionals
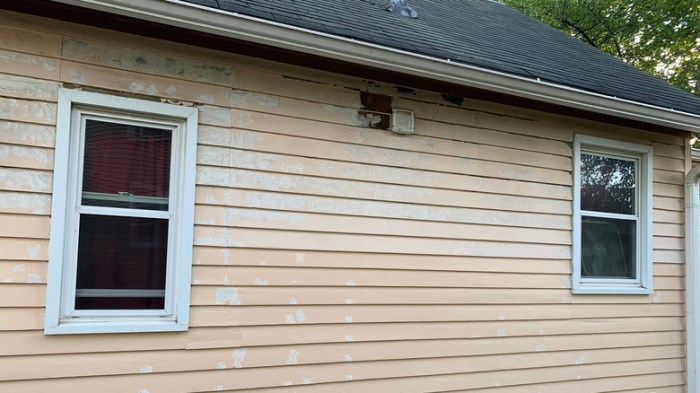
Source: housedigest.com
Finding the right contractor for your cedar siding repair and painting project is crucial for a successful outcome. A skilled professional can save you time, money, and potential headaches down the line. This section will guide you through the process of finding and selecting a reputable contractor.
Resources for Finding Reputable Contractors
Several resources can help you locate contractors specializing in cedar siding work. Online directories like Angie’s List, HomeAdvisor, and Yelp often feature reviews and ratings from previous clients. Checking your local Better Business Bureau (BBB) website is also a smart move, as it provides information on business complaints and ratings. Don’t forget to ask friends, family, and neighbors for recommendations – word-of-mouth referrals are often the most reliable. Finally, searching for “cedar siding repair [your city/region]” on Google or other search engines will yield a list of local businesses. Remember to thoroughly vet any contractor you find, regardless of the source.
Questions to Ask Potential Contractors
Before committing to a contractor, it’s vital to ask clarifying questions to ensure they’re the right fit for your project. These questions should cover their experience, licensing and insurance, proposed work methods, materials they use, and their pricing structure. Specifically, you should inquire about their experience with cedar siding, their process for preparing the surface before painting, the type of paint they recommend and why, their warranty policy, and their expected timeline for completion. Requesting references from previous clients allows you to gauge their work quality and professionalism firsthand. Ask about their cleanup procedures after the project is complete, and what their contingency plan is for unexpected issues.
Professional vs. DIY: Advantages and Disadvantages, Cedar siding repair and painting near me
Hiring a professional offers several advantages, including expertise in handling cedar siding, access to specialized tools and equipment, and the benefit of insurance coverage in case of accidents. Professionals also typically work faster and more efficiently, ensuring a higher-quality finish. However, hiring a professional comes with a higher price tag. DIY projects, on the other hand, can save you money upfront, but require significant time investment, potentially lack the professional finish, and expose you to the risk of injury or mistakes that could cost more in the long run. Consider your own skill level, time constraints, and budget before deciding between a DIY approach or hiring a professional.
Factors to Consider When Choosing a Contractor
Choosing the right contractor involves careful consideration of several key factors. The following table summarizes these factors for easier comparison:
| Experience | Licensing/Insurance | References | Pricing |
|---|---|---|---|
| Years of experience in cedar siding repair and painting; specific experience with similar projects. Look for a portfolio of completed work. | Verify licenses and insurance are current and valid. This protects you from liability in case of accidents or damage. | Request at least three references and contact them to inquire about the contractor’s work quality, professionalism, and adherence to timelines. | Obtain detailed, itemized quotes from multiple contractors. Compare not just the total cost but also the breakdown of labor and materials. Be wary of unusually low bids. |
Cost Considerations
Repairing and painting cedar siding is an investment, and understanding the cost factors is crucial for budgeting and making informed decisions. Several variables significantly impact the final price, ranging from the extent of the damage to the chosen paint and the contractor’s rates. Knowing what to expect can prevent unexpected expenses and ensure a smooth project.
The cost of cedar siding repair and painting is influenced by a number of factors. These factors interact to determine the overall expense, making it essential to get detailed estimates before starting any work.
Factors Influencing Cost
Several key elements contribute to the overall cost. The size of the area needing repair or painting is a major factor, with larger areas naturally costing more. The condition of the existing siding significantly affects labor costs; extensive damage requires more time and effort to repair, increasing the overall expense. The type of repair needed—simple patching, board replacement, or extensive rot repair—also impacts the price. Material costs, including the cost of cedar replacement boards, wood filler, primer, paint, and other supplies, vary depending on quality and brand. Finally, the contractor’s labor rates, experience, and overhead contribute to the final cost. Higher-quality paints and experienced professionals often command higher prices, but may also offer longer-lasting results.
Cost Breakdowns for Different Repair Scenarios
Let’s consider some example scenarios to illustrate potential cost variations.
Scenario 1: Minor Repairs and Repainting. Imagine a small section of siding (approximately 50 square feet) requiring minor repairs (filling small cracks and holes) and repainting. The cost might range from $500 to $1,000, including materials and labor. This estimate assumes relatively easy access and minimal prep work.
Scenario 2: Significant Damage Repair and Repainting. Now consider a larger area (200 square feet) with significant damage requiring board replacement, extensive rot repair, and repainting. This scenario could cost between $2,000 and $5,000, depending on the extent of the damage and the cost of materials. The higher end of the range accounts for the cost of replacing multiple siding boards and the increased labor involved.
Scenario 3: Full House Repainting. A complete repainting of a typical single-family home’s cedar siding (around 1500 square feet) could range from $3,000 to $8,000 or more, depending on the complexity of the job, the number of coats needed, and the type of paint used. Preparation work, like power washing and scraping, adds significantly to the labor cost in this scenario.
Long-Term Cost Savings
Proper maintenance and timely repairs of your cedar siding offer significant long-term cost savings. Addressing minor issues early prevents them from escalating into major, more expensive problems. Regular painting protects the wood from moisture damage, rot, and insect infestation, extending its lifespan and reducing the need for extensive repairs down the line. Investing in quality materials and professional workmanship initially may seem costly, but it often translates to lower maintenance costs over the years, resulting in substantial long-term savings. A well-maintained cedar siding can last for decades, minimizing the need for costly replacements.
Tips for Getting Accurate Estimates
To obtain accurate estimates, it’s crucial to contact multiple contractors. Provide each contractor with a detailed description of the work, including the size of the area, the extent of damage, and your desired paint type. Request detailed, itemized estimates that clearly break down labor costs, material costs, and any other expenses. Don’t hesitate to ask questions about their experience with cedar siding and their proposed repair techniques. Compare estimates carefully, considering both price and the contractor’s qualifications and reputation. Choosing a reputable contractor ensures quality workmanship and minimizes the risk of future problems.
Closing Notes

Source: prosuperiorconstruction.com
Revitalizing your cedar siding can significantly enhance your home’s beauty and protect it from the elements. Whether you tackle the project yourself or hire a professional, understanding the process, from identifying damage to selecting the right paint, is key to a successful outcome. Remember, proper preparation and the right techniques will ensure your cedar siding remains a stunning feature of your home for years to come. So, grab your brushes (or call a pro!), and let’s get started!
FAQ Overview
What type of paint is best for cedar siding?
Oil-based paints offer superior durability and water resistance, but water-based paints are lower in VOCs and easier to clean up. Consider your climate and personal preferences.
How often should I repaint my cedar siding?
Every 3-5 years, depending on the climate and the type of paint used. Regular inspections will help you determine when repainting is necessary.
Can I paint cedar siding myself?
Yes, but it’s labor-intensive and requires careful preparation. If you lack experience, hiring a professional might be a better option to ensure a quality finish.
How can I prevent future damage to my cedar siding?
Regular cleaning, prompt repairs of any damage, and proper caulking around windows and doors will help extend the lifespan of your siding.
What’s the average cost of cedar siding repair and painting?
The cost varies greatly depending on the extent of damage, the size of the house, and the cost of labor in your area. Get multiple estimates from contractors for accurate pricing.
Comments are closed.