How Much Does It Cost to Change Vinyl Siding?
How much does it cost to change vinyl siding? That’s a great question, and the answer depends on a lot of factors! We’re diving into the world of vinyl siding replacement, exploring everything from the type of siding and your home’s size to labor costs in your area and potential DIY savings. Get ready to understand the price breakdown and make informed decisions for your next home improvement project.
This guide breaks down the costs associated with vinyl siding replacement, helping you budget effectively. We’ll cover material costs, labor expenses, and hidden costs like permits. We’ll also compare professional installation versus a DIY approach, highlighting the pros and cons of each. By the end, you’ll be equipped to confidently navigate the process and choose the best option for your home.
Factors Affecting Vinyl Siding Replacement Cost
Replacing your vinyl siding is a significant home improvement project, and the total cost can vary considerably. Several factors influence the final price, making it crucial to understand these variables before you begin. This will help you budget effectively and avoid unexpected expenses.
House Size and Siding Area
The size of your house directly impacts the cost. More square footage means more siding needed, leading to higher material costs. Labor costs also increase proportionally with the project’s scale. For instance, a 1,500 square foot house will naturally require more siding and labor than a 1,000 square foot house. It’s common for contractors to price per square foot, so a larger surface area translates to a higher overall bill.
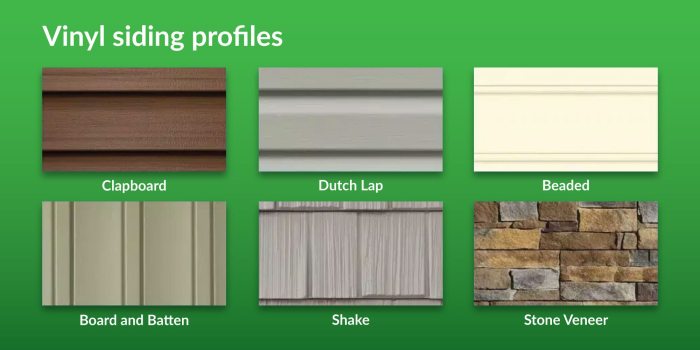
Vinyl Siding Type and Quality
Vinyl siding comes in various grades and styles, significantly affecting the price. Standard siding is generally more affordable but may offer less durability and aesthetic appeal. Premium siding, on the other hand, boasts enhanced features like thicker profiles, improved color retention, and enhanced weather resistance, resulting in a higher initial cost but potentially lower long-term maintenance expenses. The specific features and brand also influence the cost; some manufacturers command higher prices due to their reputation and innovative technologies.
Labor Costs and Geographic Location
Labor costs vary significantly depending on your geographic location. Areas with higher costs of living typically have higher labor rates for contractors. The availability of skilled labor also plays a role; areas with a shortage of qualified installers may command higher prices. For example, a siding replacement project in a major metropolitan area like New York City will likely be more expensive than a similar project in a smaller town in the Midwest.
Material Availability and Market Prices
The price of vinyl siding fluctuates due to material availability and overall market conditions. Supply chain disruptions, raw material costs, and fluctuations in fuel prices all contribute to price changes. For example, during periods of high demand or limited supply, the cost of vinyl siding can increase, impacting the overall project budget. It’s wise to get multiple quotes at different times to account for market fluctuations.
Additional Costs: Permits and Waste Disposal
Beyond the cost of materials and labor, you’ll need to factor in additional expenses. Building permits are often required for exterior home renovations, adding to the overall cost. Proper waste disposal of old siding and other debris is also essential and can incur extra charges. These additional costs can easily add hundreds of dollars to your project.
Vinyl Siding Material Cost Comparison
| Siding Type | Thickness (inches) | Price per square foot (USD) | Notes |
|---|---|---|---|
| Standard Vinyl | 0.040 – 0.046 | $1.50 – $3.00 | Basic styles, limited color options |
| Premium Vinyl | 0.046 – 0.050 | $3.50 – $6.00 | Enhanced durability, wider color selection |
| Insulated Vinyl | 0.046 – 0.050 + insulation | $5.00 – $8.00 | Improved energy efficiency |
| High-End Vinyl (e.g., CertainTeed, James Hardie) | 0.050+ | $7.00+ | Superior quality, longest warranties |
Professional vs. DIY Installation
Choosing between professional and DIY vinyl siding installation is a significant decision impacting both cost and outcome. Factors like your experience with home improvement, available time, and desired level of quality will influence your choice. While DIY can save money upfront, professional installation offers peace of mind and often ensures a longer-lasting, more aesthetically pleasing result.
Professional installation guarantees adherence to manufacturer specifications, resulting in a longer warranty and potentially lower long-term costs. DIY installation, while potentially cheaper initially, can lead to mistakes that are costly to rectify later.
Professional Vinyl Siding Installation: Advantages and Process
Professional installers possess the expertise and experience to complete the job efficiently and correctly. They have access to specialized tools and equipment, ensuring a precise and professional finish. They’re also familiar with building codes and best practices, reducing the risk of future problems.
A typical professional vinyl siding installation involves these steps:
- Preparation: This includes removing old siding, inspecting the underlying structure for damage, and preparing the walls for new siding.
- Installation of Sheathing and Flashing: This crucial step ensures proper water management and protects the house from moisture damage. Professionals use high-quality materials and techniques to prevent leaks and water intrusion.
- Siding Installation: Starting from the bottom, installers carefully install the siding panels, ensuring proper overlap and alignment. They use specialized tools to cut and fit panels around windows, doors, and other features.
- Finishing Touches: This includes installing trim, caulking seams, and cleaning up the work area. Professionals pay attention to detail, ensuring a clean and professional finish.
DIY Vinyl Siding Installation: Challenges and Necessary Tools, How much does it cost to change vinyl siding
Attempting a DIY vinyl siding installation presents several challenges. Improper installation can lead to issues such as water damage, warped siding, and an unprofessional appearance. The task requires significant time, physical effort, and a good understanding of construction principles. Incorrect installation can void warranties.
To tackle a DIY project, you’ll need the following tools and equipment:
- Measuring tape
- Circular saw or hand saw (for cutting siding)
- Utility knife
- Hammer
- Drill with various drill bits
- Level
- Safety glasses and gloves
- Ladder (potentially scaffolding for taller buildings)
- J-channel, starter strip, and other necessary trim pieces
DIY Vinyl Siding Installation: Step-by-Step Guide with Safety Precautions
Before starting, carefully read the manufacturer’s instructions for your chosen siding. Always prioritize safety. Wear appropriate safety gear, including safety glasses and work gloves. Use a sturdy ladder and ensure it’s properly positioned on level ground. Never overreach. If you feel uncomfortable at any point, consult a professional.
- Preparation: Remove old siding carefully, taking note of any underlying issues that need addressing. Ensure the wall sheathing is sound and repair any damage.
- Installation of Starter Strip and J-Channel: Install these crucial components to provide a straight and even starting point for the siding panels.
- Siding Panel Installation: Begin at the bottom and work your way up, ensuring proper overlap and alignment. Use a level frequently to maintain straight lines.
- Cutting and Fitting Panels: Carefully measure and cut panels around windows, doors, and other obstacles. Use a sharp utility knife or saw for clean cuts.
- Installation of Trim and Finishing: Install trim pieces and caulk any gaps or seams to ensure a watertight seal.
Finding and Choosing a Contractor
Source: fixr.com
Finding the right contractor for your vinyl siding replacement is crucial for a successful and stress-free project. A reputable contractor will not only deliver quality work but also manage the project efficiently and transparently. Choosing poorly can lead to costly mistakes, delays, and even legal issues.
Finding Reputable and Experienced Contractors
Several avenues exist to locate experienced and trustworthy contractors. Start by asking for recommendations from friends, family, and neighbors who have recently had similar work done. Online reviews on platforms like Yelp, Angie’s List, and HomeAdvisor can provide valuable insights into a contractor’s reputation and past performance. Check the Better Business Bureau (BBB) website for any complaints or unresolved issues. Finally, consider attending local home improvement shows or contacting your local home builders association for referrals. Remember to verify all information independently.
Obtaining Multiple Quotes and Comparing Prices
Never settle for a single quote. Contact at least three to five contractors to get a range of bids. Ensure that all quotes include a detailed breakdown of the costs, specifying materials, labor, permits, and any additional expenses. Directly compare apples to apples; don’t compare a quote that includes premium materials with one that uses standard materials. Pay close attention to the warranty offered and the timeline for project completion. The lowest bid isn’t always the best; consider the contractor’s reputation and experience as well. For example, a bid that’s significantly lower than others might indicate a compromise on quality or materials.
Verifying Contractor Licenses and Insurance
Before committing to any contractor, verify their licensing and insurance. Contact your state’s licensing board to confirm their license is valid and up-to-date. Request proof of general liability insurance and workers’ compensation insurance. These protect you from financial liability in case of accidents or damages during the project. Lack of proper insurance can leave you responsible for any injuries or property damage. For example, if a worker is injured on your property and the contractor lacks workers’ compensation insurance, you could face significant legal and financial consequences.
Elements of a Comprehensive Contract
A comprehensive contract is essential to protect both you and the contractor. It should clearly Artikel the scope of work, including materials, colors, and installation details. Specify the payment schedule, including deposits and final payment upon project completion. Include the start and completion dates, as well as any penalties for delays. The contract should also detail the warranty on materials and workmanship. Finally, it should include a clear dispute resolution process. A well-written contract minimizes misunderstandings and protects you from unforeseen issues. A sample clause might state: “Contractor guarantees all workmanship for a period of one year from the date of project completion.”
Evaluating Contractor Bids and Proposals
To effectively evaluate bids, use a checklist. This will ensure you consider all critical factors.
- Contractor’s experience and reputation
- Detailed breakdown of costs
- Materials specifications and warranties
- Project timeline and completion date
- Payment schedule and terms
- Insurance and licensing verification
- Contract clarity and comprehensiveness
- References and testimonials
Reviewing these aspects ensures a well-informed decision, protecting your investment and ensuring a successful siding replacement.
Visual Examples of Vinyl Siding Projects: How Much Does It Cost To Change Vinyl Siding

Source: ebyexteriors.com
Choosing the right vinyl siding depends heavily on your budget and aesthetic preferences. Let’s explore some examples to illustrate the range of possibilities. These examples are based on average costs in the US, and regional variations should be considered.
High-End Vinyl Siding Project
This project features premium-grade vinyl siding with a realistic wood-grain texture, such as CertainTeed Cedar Impressions or Mastic HomeStyle. The color scheme might include a deep, rich brown or a sophisticated gray, complemented by contrasting white or cream trim. Architectural details are emphasized with intricate corner boards, window surrounds, and decorative accents. The installation includes meticulous attention to detail, ensuring clean lines and a seamless finish. Expect to see features like insulated vinyl siding for improved energy efficiency and possibly custom-cut pieces to perfectly fit unusual architectural features. The total cost for a high-end project, including materials and labor, could range from $10 to $20 or more per square foot, depending on complexity and regional pricing.
Mid-Range Vinyl Siding Project
A mid-range project balances quality and affordability. This might involve using a durable, standard-grade vinyl siding with a solid color, such as a classic white or a neutral beige. While it may lack the intricate detailing of a high-end project, it still provides a clean and attractive look. Simple trim styles are used, focusing on functionality and cost-effectiveness. This approach prioritizes a long-lasting, visually appealing finish without unnecessary embellishments. The cost for a mid-range project typically falls between $6 and $12 per square foot, depending on the chosen materials and the extent of the project. Consider using a reputable brand known for quality and durability within their price point.
Budget-Friendly Vinyl Siding Project
This project emphasizes cost savings without compromising durability. The focus is on using standard-grade vinyl siding in a single, solid color like white or a light neutral shade. Simple trim styles are used to minimize costs, and installation might involve some DIY efforts to further reduce expenses. While it may lack the visual sophistication of higher-end projects, it provides a significant improvement over older siding and delivers a respectable, functional finish. The cost for a budget-friendly project can range from $3 to $7 per square foot, depending on the extent of DIY involvement and the cost of materials. Careful planning and efficient material usage are crucial for success.
Impact of Color and Style on Overall Appearance
Different colors and styles significantly alter a home’s aesthetic. A light color like white or beige can make a home appear larger and brighter, while darker colors, such as deep browns or grays, create a more dramatic and sophisticated look. Vertical siding creates a taller, more slender appearance, whereas horizontal siding provides a classic, traditional look. The interplay between siding color and trim color is crucial. Contrasting colors can highlight architectural details, while matching colors create a more unified and cohesive appearance. Consider the architectural style of your home when selecting colors and styles; a Victorian home might look best with detailed trim and darker siding, while a ranch style home might suit a simpler design and lighter colors.
Various Trim Styles and Their Impact on Project Cost
Trim styles significantly impact both the aesthetic and cost of a vinyl siding project. Simple, straight trim is the most cost-effective option. More elaborate styles, such as corner boards with decorative molding or intricate window surrounds, add to the overall cost. The use of wider trim can also increase expenses, but it can also enhance the visual appeal of the home. Consider the level of detail you desire and weigh it against your budget. A balance between aesthetic appeal and cost-effectiveness is key. For instance, using wider trim around windows and doors while opting for simpler trim elsewhere can achieve a visually appealing result without excessive cost.
Wrap-Up

Source: ebyexteriors.com
Replacing your vinyl siding is a significant investment, but understanding the cost factors empowers you to make smart choices. Remember to get multiple quotes from reputable contractors, carefully consider DIY versus professional installation, and factor in all potential costs. With careful planning and research, you can achieve the beautiful, updated exterior you desire while staying within your budget. Now go get that gorgeous new siding!
Q&A
What’s the lifespan of vinyl siding?
Vinyl siding typically lasts 20-30 years, depending on quality and maintenance.
Can I finance vinyl siding replacement?
Yes, many contractors or lenders offer financing options for home improvement projects. Check with your contractor or bank.
What are common warranty periods for vinyl siding?
Warranties vary, but you can typically expect a 20-30 year warranty on the siding itself, and shorter warranties on labor and installation.
How long does vinyl siding installation typically take?
The timeline depends on house size and complexity, but it can range from a few days to several weeks for larger homes.
What’s the best time of year to replace vinyl siding?
Spring and fall generally offer ideal weather conditions for vinyl siding installation.
Comments are closed.